


Decoding PAILs and RAILs
The one flaw in the Functional Range Conditioning system is its heavy use of acronyms. It has created a culture of separation, utilizing a language only understood within the context of the FRC group. Starting with CARs and developing into the new Kinstretch IsoMPs, there is no lack of subjective nomenclature. The system is kept secretive and mysterious, which translates into a lot of guesswork by a curious and seeking public.
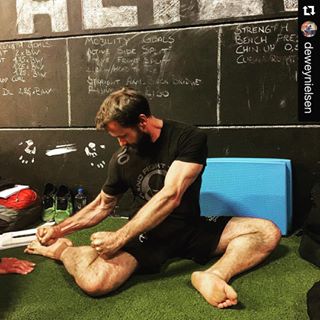
PAILs and RAILs are training protocols designed to increase range of motion by combining strength and stretching. The intent is to get the brain to utilize as many motor units as possible to achieve a specific movement. ‘ILs’ stand for isometric loading (this is the strength part). The ‘As’ stand for angular, symbolizing the limitless angles in which they can be performed and reference to the closing or opening angle of the motion. The ‘P’ stands for progressive, or “long side” contraction, and the ‘R’ stands for regressive or “short side” contraction.Here’s an example in expanding hip internal rotation, or the sleeper stretch:.
Pushing the knee into the floor is an overcoming isometric, pressing against an immovable surface. Pulling the knee up against the palm of the hand is a yielding isometric, static work (at a particular angle) against resistance.
This Press-Pull-Press sequence enhances movement by focusing on tension at both sides of the joint. As the opening angle gets bigger the closing angle gets smaller, you get deeper into the hold or stretch. This video from the functional anatomy blog continues this train of thought more thoroughly:
To recap:
-
2-minute hold in position one*
-
Contract deeper into the stretch at building degrees of tension for 20+ seconds
-
Contract the shorter angle, regressive tissue maximally for 20 seconds
-
Relax into new position and repeat if desired
*Skip the pre-emptive 2-min hold if the user is hypermobile. They have no problem getting into position, just creating controllable tension there.
In the world of rehabilitation, PAILs can take on a gentler, more coaxing role in tissue repair. Level 1 PAILs are low level contractions against resistance. Otherwise known as PNF , it is used to communicate to damaged ligaments and tendons where and in what direction new cells should be laid down. Level 2 PAILs are used to strengthen the newly acquired range and create joint disassociation. These consist of the 2-minute stretch and ramping contraction deeper into the stretch. Level 3 PAILs are the 4-step process listed above. These are used for asymptomatic people looking for rapid improvements in range of motion. RAILs are the defining feature, teaching the regressive tissue to function short.
From PAILs and RAILs, we can then shift into lift-offs and passive holds to challenge end range control. Manipulating hovers, heights, and body orientations are all a means to explore.
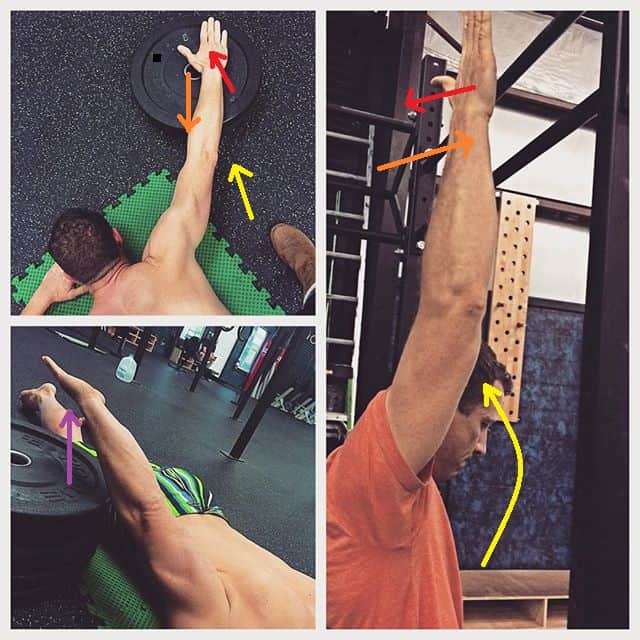
The yellow through red arrows represent the pull-push-pull, and the purple demonstrates a lift off a surface.
TO REVIEW:
- PAILs and RAILs are the meat and potatoes of the FRC system
- PAILs have three levels of intensity and purpose
- RAILs correspond to the highest level of PAILs, refer to the short-sided tissue, and is directed opposite of intended movement
- Contractions should reach near maximal effort, and should be gradually increased at 10% increments
- Once a new range has been achieved, the goal is to relax into it as much as possible
- PAILs and RAILs serve as the gateway to end range control
A COLLECTIVE LIBRARY OF FRC, FIGHTING MONKEY, PRI, & MOVNAT RESOURCES CAN BE FOUND HERE.
Hi,
First, thank you for all this information. I have read all your articles about FRC. I just wanted to know when to do PAIL’s and RAIL’s?
When I train, is it better at the start or at the end of the training because it is demanding. I’m doing CAR’s everyday. When I woke up in the morning and also into my warm up. Do you recommend to do CAR’s at the end of a training to “explore” the gain of range of motion?
Once again, thank you for your great work!
Simon
Hey Simon. Systematically, PAILs/RAILs are programmed after CARs, once a limitation has been realized. Personally, I would do them a the beginning of a training session, and make them an area of focus. You can also pepper them in after sets should a rep (what I’m assuming as weight training) feel limited or a joint feel particularly stuck. I think post training CARs are fantastic, and can tell whether your in-session movements helped preserve ROM or worked against it. Again, though, they are a tool to do with what you wish. Grant yourself the liberty to utilize them whenever or however you see fit.
I am curious about the hockey FRC video. It says hold for 2 min in certain stretches, but I have been told that holding any stretch past 45 sec – 1 min is not beneficial. That it just makes the muscles too lax. Thoughts
I believe what you have been told is incorrect. The 2min time frame came a Helen Langevin study from 2005. It is the time needed to access the fibroblasts at the cellular level.